Sunday, 2 September 2012

Busy weekend .................

Onwards today although other commitments meant I left Joe to it for some time, strange how he got more done without me !!
The day started with the roll bar fitting, we have the standard one so much easier than the complex RAC type. It took a long time to modify it for the high level light and getting the wire to thread through the closed end bar was a devil of a job. However Joe persevered and made a super job of drilling and filing the body to suit . Whilst I was away he also fitted the fuel filler cap which does look very nice and seems a quality item. Of course fitting these items is not a quick job as an error could be very costly so slowly does it is the order of the day !


Roll bar and filler cap
The only problem with the roll bar is the manufacturer had powder coated the securing bolts so it was impossible to use them so need to buy a couple tomorrow.

The cycle wings and my attachment system were next, a chap kindly wrote to me from the forum and I have taken his advice and used Isopon P40 for the initial attachment . First a couple of views of my brass mounts ...

Captive bolts at one side

Captive nuts at the other
The arms of the cycle wing carriers were protected with plastic and the bolts protected with vaseline .....


You will note the use of the nice smelling vaseline, I think I am going to be in the sh1t when she notices it missing from her handbag ! hopefully I can get to boots tomorrow morning and replace it before she notices ! Anyway the car has priority !!
Next job was to position a wing and rough up where the brass plates will sit ............

Cycle wing interior
Then on with a huge dollop of P40 and place the wings in position

Isopon P40 covering brass mount
After taking the dog for a walk we removed the wing and all had stuck firmly in place, with a little tidying with the dremel we were able to re fit the wing onto its carriers, I could breathe out now !

Wing refitted after glue
All that remains is to glass cloth the mounts on the underside and all should be well, of course if they drop off the first time we drive the car I will know my cunning plan was a failure ! I have however tried to pull them off as hard as I can and the stuff sticks like sugar to a blanket !! A really good weekend making huge progress maybe not so many winters nights after all !
another 8 hour day today 193 total.


Saturday, 1 September 2012

Pressing on ....................


Another long day today getting to the stage where everything takes a little longer as where the body is involved can't afford to make any mistakes ! First job of the day was to install our imaginary steering column (piece of waste pipe) and position using dashboard to establish the cut out in the front edge of the scuttle.


Once we were happy it was as near as a piece of waste pipe could be we were able to mark out and dremel the scuttle front edge to suit.

Scuttle front edge relieved to clear steering column waste pipe
Having earlier secured the sides of the body in place with a couple of large head rivets we were able to find and expose the fitted scuttle rivnuts using the woodbit method from Jons blog which works superbly well. We then fitted two cap heads into the rivnuts and applied paint to them.

Cap heads in situ

Wet paint on cap head
The scuttle was then fitted into place on the wet cap heads and voila accurate holes for the bolts

Bottom edge of scuttle
The scuttle was now finally secured in place using stainless cap heads and washers

Scuttle securing bolts
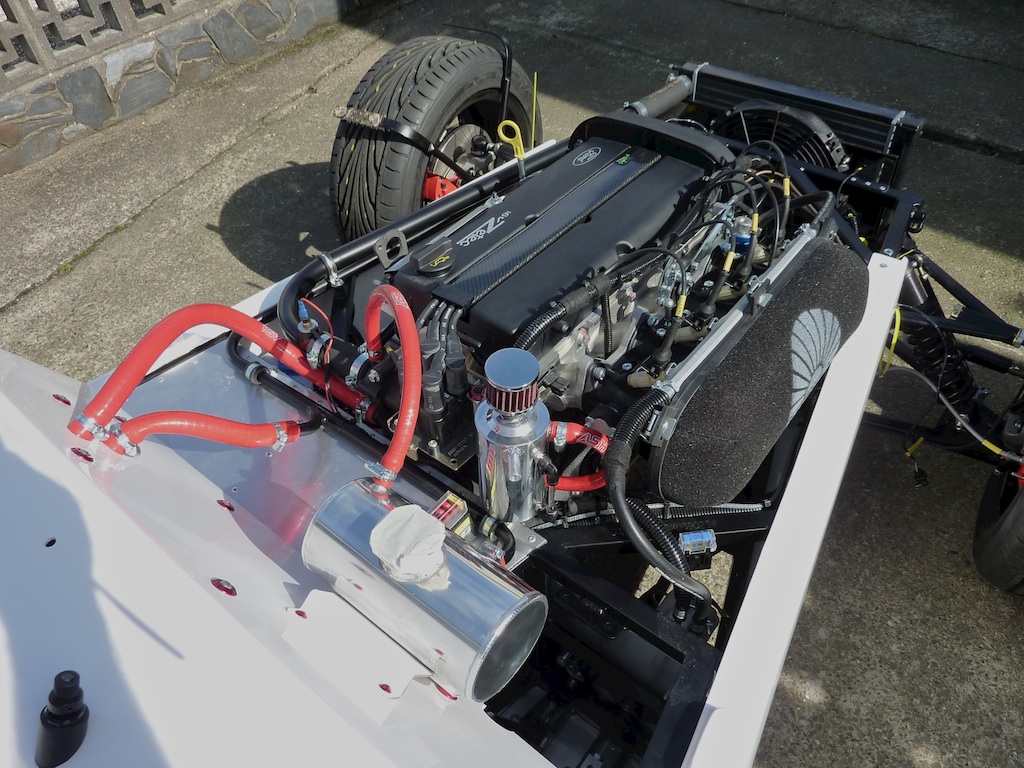
Now that the scuttle was in place Joe got to fit his header tank and the red hoses which he had been salivating about for some time

Engine bay

A little work on the rear we fitted the number plate light and couldn't resist a pic with the number in place !


Rear (obvious really LOL)
Number plate light

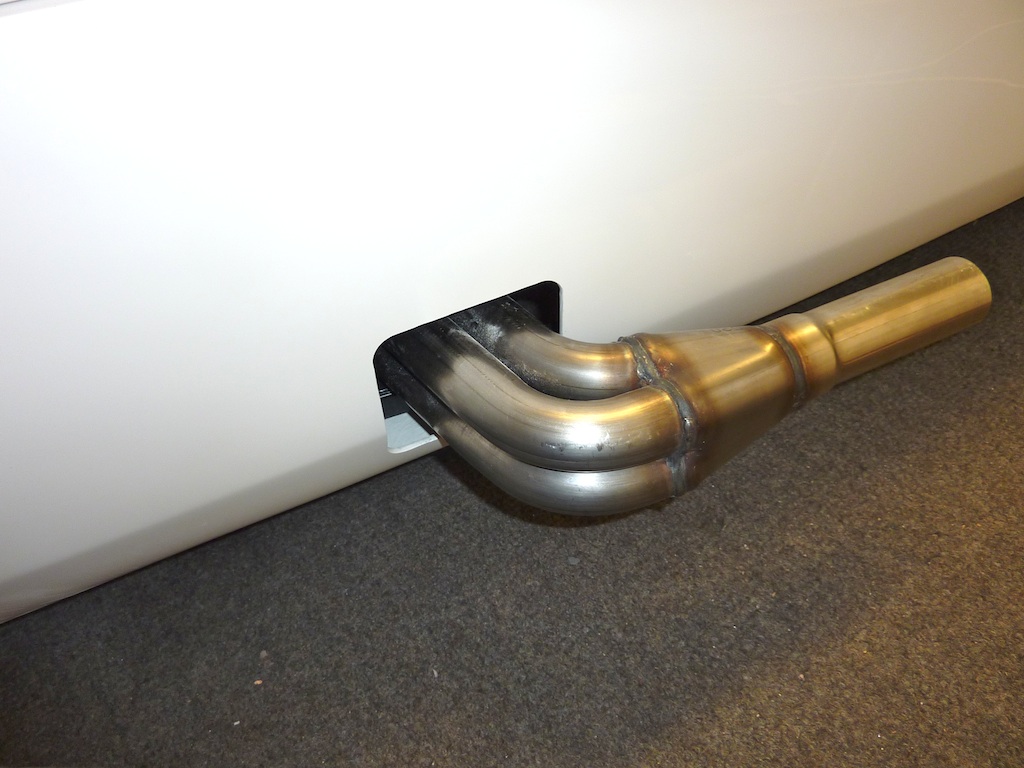
Final job of a long day was to fit the exhaust, everything takes longer than anticipated, getting the pipe angles correct to put as little strain on the manifold as possible took a while fiddling around, but we got there in the end

Carbon can


9 hrs today 185 total.


Friday, 31 August 2012

The fatal flaw in my cunning plan ! ............

Hmmm spotted the fatal flaw in my plan with regards to being able to remove the cycle wings should I need to. The relative angles of the through bolts onto the cycle wing carrier arms would make it difficult if not impossible to remove the wings as intended so having thought about it I have modified the brass plates for one of them to carry two captive nuts rather than downward facing bolts. I then drilled the strip for the resin to grip.

Attachment bracket complete
Couldn't resist putting another shiny bit on ! (pathetic I know !! how old are we LOL). We made a mounting cylinder affair to hold the oil catch tank and fitted it into place, like Magpies we stood back and admired the shiny bit !

Oil catch can
Just need some hose and jubilee clips to finish the job. 3 hours today 176 total.


Wednesday, 29 August 2012

Front wings .............

Having looked at our lovely front wings there is not a chance in hell we are going to drill them to mount them. Every car we looked at when we visited the factory had crazing and chipping around the front wing mounting bolts which looked awful. Having given the matter some thought I decided upon this plan. I drilled the mounts and cut four lengths of 2.5mm x 30mm brass strip which were drilled to match. I then silver soldered stainless bolts down through the brass and then ground off most of the heads. I am left with a brass strip with captive stainless bolts to glass into our wings which are fibreglass and not abs. I intend to drill the brass strips with a number of holes for the resin to grip and then have enough bolt length for a piece of glass cloth over the lot. Fingers crossed the plan will work we shall see ! I also fitted the last fuel line so the engine bay is almost complete. 3 hours today 173 total.

Wing mount bolted to frame

Wing mount bolts ground off

Monday, 27 August 2012

Long day .........................


Sitting here having a glass of red after a long and successful day. Thanks mainly to Jon's blog we had rehearsed fitting the body so knew roughly what to expect. Both sides were fitted into place using wallpaper scrapers and foul and abusive language to lever them under the chassis sides, one was particularly tight so glad they don't have to come off again ! The scuttle and bonnet were fitted to make sure the panel gaps remained the same and then the rear was bolted on together with the rear wings which had previously been drilled and assembled. My friend Dave came to give a hand making sure all remained aligned whilst we tightened both sides evenly. We then spent some time pondering how accurate we could get the body alignment and after messing around adjusting first one bit and then the other decided that it was pointless trying to get it to within a micron as it would flex more than that anyway ! When we finally had a unanimous decision about where the rear end should sit we fitted the metal support strip underneath using rivnuts which was an absolute xxxxxxx as there was only just room to slide under the car and drill the holes etc ! After we had the body securely in place Joe tidied up the manifold exit hole and we fitted the manifold, our heat shield appears to sit ok and hopefully will do its job. For safety I put the car back on its wheels and we had a drool looking it over. I can see the light at the end of the tunnel now or maybe its the front light of the train going to run us over !! 8 hours today really good progress !!! Cheers !! 170hrs in total. Many thanks Dave.

Body in place
Rear offside
The crew
Looking like a car


Heat shield
Exhaust exit


Saturday, 25 August 2012

small jumps ..................

Had a busy week so not much building gone on ! Having fitted up our dashboard we decided the switches and labels which were supplied frankly detracted from the appearance, the labels particularly curled up and looked horrid even before it got near the car. Joe researched and bought some new switchgear which looks much smarter and in our opinion has transformed the dash and of course lights up wooooo ...............

Dash with new switches
Being particularly picky Joe has arranged for two brushed aluminium bezels to be machined to surround the indicator and hazards switch to match the rest. The rolling chassis is all but complete now I have to fit one more fuel line and until the upper steering column arrives that is it. This afternoon I fitted the battery tray supplied for my small battery and secured the battery.

Battery securely installed
Monday we hope to fit the lower body sides and rear. 3 hours today 162hrs total.


Saturday, 18 August 2012

Done ...................

The suspension and steering set up was finished on Thursday but the gods are against us and it has not stopped raining long enough for the garage to bring it back to my garage on their transporter. We did not think it wise to risk getting all the exposed electrics wet !! It will return on monday if possible. Summer, what there has been of it, is slipping away fast and I am resigned to some cold days and nights getting it finished. Hopefully get the body on next week we shall see.